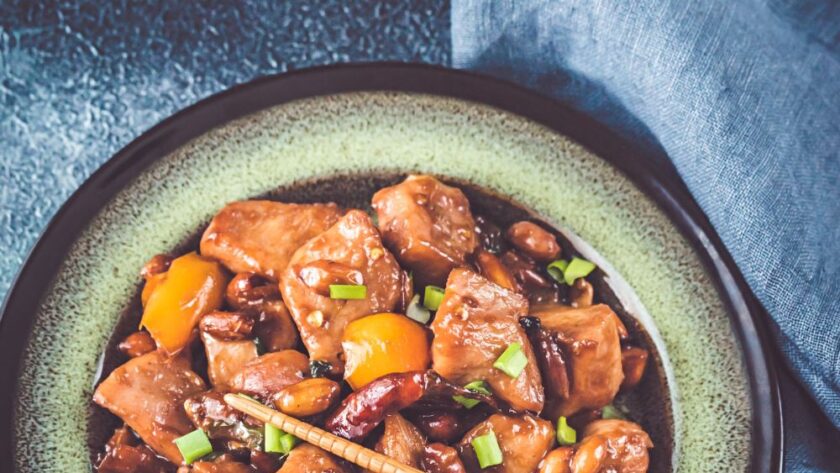
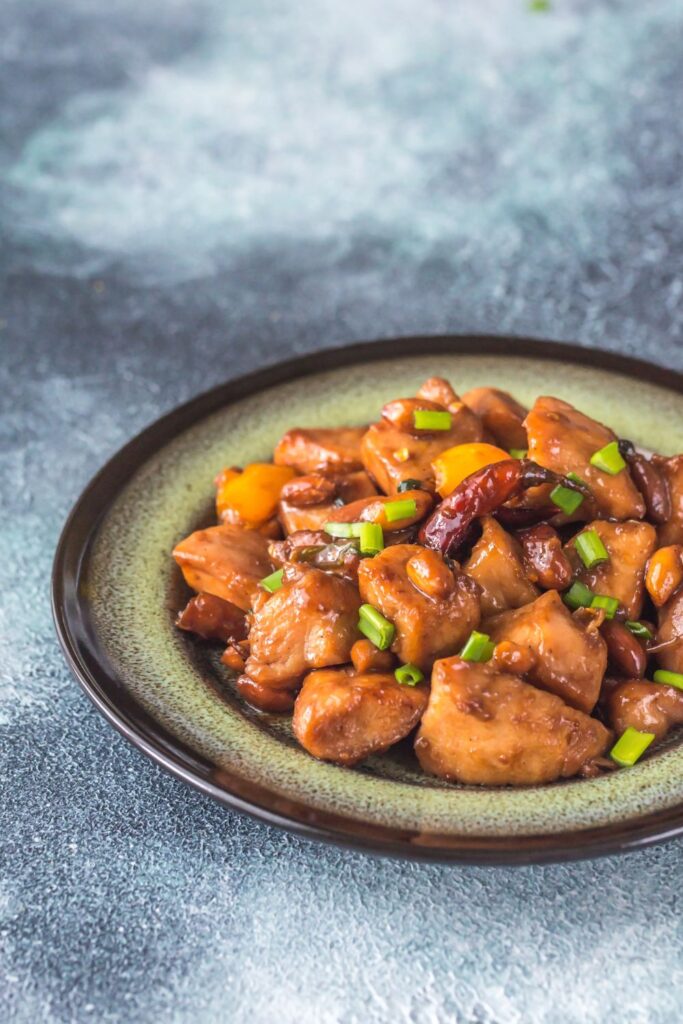
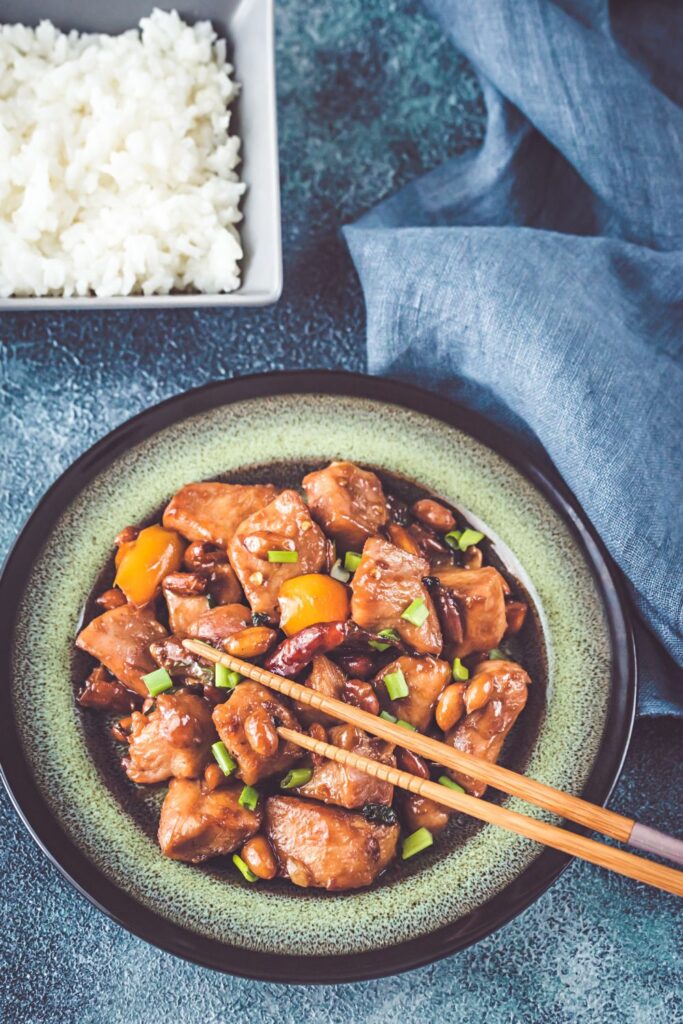
The first time I made Jamie Oliver Kung Pao Chicken, I was chasing that exact hit of spice and crunch you get from a really good takeout joint. You know the kind—sticky, fiery sauce clinging to golden chicken bits, with peanuts that practically shatter between your teeth. This one nailed it. Shockingly simple, but with layers that creep up on you. The ribbon salad? A total curveball. Light, cold, punchy. I didn’t expect to like it so much. Inspired by Jamie Oliver.
Ingredients Needed
- 1 tbsp Sichuan peppercorns
- 2½ tbsp cornstarch
- 4 chicken thighs (skinless, 350g)
- Groundnut or veg oil
- 4 garlic cloves
- 5 cm ginger
- 2 spring onions
- 6 dried red chilies
- 2 tbsp low-salt soy sauce
- ½ tbsp rice wine vinegar
- 1 heaped tbsp honey
- 50g peanuts
- 1 punnet salad cress
Ribbon Salad:
- ½ cucumber
- 1 large carrot
- ½ bunch coriander
- 1 tbsp soy sauce
- 1 tbsp vinegar
How To Make Jamie Oliver Kung Pao Chicken
- Start with the salad. It’s the quietest part of the whole thing. Shave the cucumber and carrot into ribbons. You’ll need a peeler with a bit of attitude. Toss them in a bowl with coriander, soy, and vinegar. Stir. Smell. Set it aside—let it get all juicy while you cook the rest.
- Now the peppercorns. Dry-toast them in a pan. Medium heat. Watch closely—don’t walk away. The smell will smack you in the face. In a good way. Once they darken slightly, grind them down to powder. Sift out the woody bits. You’re left with this nose-tingling dust. It’s magic.
- Cut up the chicken into chunks. Toss them in a bowl with the peppercorn dust and 2 tablespoons of cornstarch. Get your hands in there. Coat every piece. It should look a little messy, maybe even wrong. That’s how you know it’s going to be crispy.
- Pour enough oil in a pan to cover the bottom—2 cm deep-ish. Medium heat. Not screaming hot. Drop in the chicken. Let it sizzle and spit for 7 to 8 minutes. Flip it if needed. When the pieces are gold and crunchy and you start sneaking bites… it’s done. Get them out. Let them drain on paper towels.
- Meanwhile, slice up the garlic, ginger, and spring onions. Not too thick. You want them to melt a little when they hit the pan. Once the chicken’s out, pour off most of the oil but keep a bit—say 2 tablespoons. Drop in the garlic and ginger. Let them go golden. Then spring onions and chilies. One more minute. It smells incredible. That kind of heat that makes your eyes water a little, but in a happy way.
- Time for the sauce. In a tiny bowl, mix half a tablespoon cornstarch with 2 tablespoons water. Stir in soy sauce, vinegar, honey. This is your gloss. Pour it into the pan. Let it bubble, thicken, coat everything in its path.
- Now—chicken goes back in. Crushed peanuts too. Toss it all. Everything should glisten. It should look messy, sticky, irresistible.
- Snip some cress over your ribbon salad. Throw on the last of the coriander. Plate the chicken next to it or pile it on top. Doesn’t matter. You’re going to devour it either way.
Why I Love This Recipe
I made this after a long day when all I wanted was something loud and comforting. My kitchen smelled like a street market—garlic, spice, oil, sweetness. My partner stood over the pan with a fork, stealing bites before I even plated it. That peanut crunch… wow. We didn’t talk much while eating. Just that kind of silence when something tastes exactly right.
Recipe Tips
- If your garlic burns, you’re moving too slow. Have everything chopped before you start.
- No Sichuan peppercorns, Try cracked black pepper with chili flakes. Not the same, but it works.
- Use tamari if you’re dodging gluten.
- Too hot, Ditch the chili seeds or use fewer peppers.
- Leftover salad goes weird the next day—but it’s great in a wrap with grilled tofu.
How To Store This Jamie Oliver Kung Pao Chicken
- At Room Temperature Leave it out too long and it gets weird. Two hours max. Eat it or fridge it.
- In the Fridge Chuck it in a sealed container. Good for 3 days. But honestly, it’s best the day you make it.
- In the Freezer Freeze just the chicken (skip the salad). Airtight container. You’ve got 3 months. Let it thaw in the fridge before reheating.
Reheating
- Microwave: Two to three minutes. Stir halfway. It’ll never be as crisp.
- Stovetop: Bit of oil, medium heat. Toss it till hot. Best way.
- Oven: 175°C, foil on top, 15–20 minutes. Slow but even.
Let’s Answer a Few Questions!
What can I use instead of Sichuan peppercorns?
Not everyone has them lying around. Use regular pepper and a sprinkle of chili flakes. It’s not authentic—but it works.
Is this too spicy for kids?
Maybe. Depends on the kid. Skip or reduce the chilies. Add a little extra honey to mellow it.
Can I swap the chicken?
Yup. Breast works. Just keep it juicy. Or go wild and use tofu if you’re feeling veg-forward.
How do I serve it?
Rice is the classic move. But noodles, stir-fried greens, or even a hot bowl of miso soup would be great.
What if I don’t have peanuts?
Cashews! Or sesame seeds for crunch. Or just skip ’em.
Nutrition Facts (per serving)
- Calories: 437
- Carbs: 25g
- Protein: 34g
- Fat: 23g
- Sugar: 7g
- Fibre: 4g
- Sodium: 596mg
Try More Recipe:
Jamie Oliver Kung Pao Chicken
Course: DinnerCuisine: British4
servings15
15
minutes437
kcalCrispy, spicy chicken tossed in sticky sauce with peanuts and fresh salad—fast, fiery, and deeply satisfying.
Ingredients
1 tbsp Sichuan peppercorns
2½ tbsp cornstarch
4 chicken thighs (skinless, 350g)
Groundnut or veg oil
4 garlic cloves
5 cm ginger
2 spring onions
6 dried red chilies
2 tbsp low-salt soy sauce
½ tbsp rice wine vinegar
1 heaped tbsp honey
50g peanuts
- Ribbon Salad:
½ cucumber
1 large carrot
½ bunch coriander
1 tbsp soy sauce
1 tbsp vinegar
Directions
- Shave cucumber and carrot. Mix with coriander, soy, and vinegar. Set aside.
- Toast peppercorns. Grind and sift.
- Cut chicken, coat in cornstarch-pepper mix.
- Fry chicken in oil until golden. Drain.
- Cook garlic and ginger in pan with 2 tbsp oil. Add onions, chilies.
- Mix cornstarch, water, soy, vinegar, honey. Add to pan.
- Return chicken, add peanuts. Toss.
- Serve with salad, topped with cress and coriander.
Notes
- If your garlic burns, you’re moving too slow. Have everything chopped before you start.
- No Sichuan peppercorns, Try cracked black pepper with chili flakes. Not the same, but it works.
- Use tamari if you’re dodging gluten.
- Too hot, Ditch the chili seeds or use fewer peppers.
- Leftover salad goes weird the next day—but it’s great in a wrap with grilled tofu.